
How to Connect Salesforce Data Cloud to Snowflake Using Salesforce IDP
Integrating Salesforce Data Cloud with Snowflake has become a crucial step for enterprises aiming to create a unified and intelligent data ecosystem. When you Connect Salesforce Data Cloud to Snowflake Using Salesforce IDP, it allows secure, scalable, and real-time access to data across platforms — enabling advanced analytics, personalized customer experiences, and smooth collaboration between business and IT teams.
This blog provides a detailed, step-by-step overview on how to Connect Salesforce Data Cloud to Snowflake Using Salesforce IDP, its benefits, technical requirements, and best practices for implementation.
Understanding the Integration: Salesforce Data Cloud and Snowflake
Before learning how to Connect Salesforce Data Cloud to Snowflake Using Salesforce IDP, it’s important to understand the role of each platform:
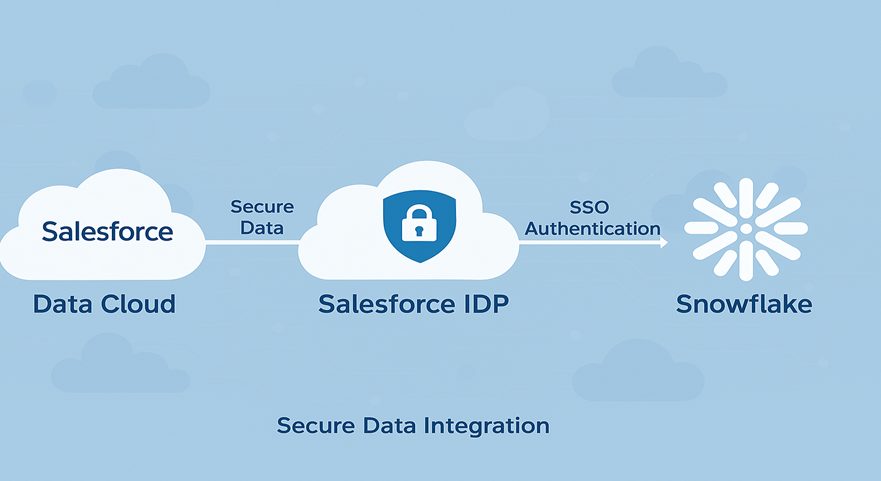
- Salesforce Data Cloud helps businesses unify data from multiple sources, providing a single source of truth for customer data.
- Snowflake acts as a cloud-based data warehouse, offering unmatched performance for data storage, sharing, and analytics.
- Salesforce IDP (Identity Provider) provides a secure authentication layer for users and applications, ensuring safe and controlled access.
By integrating these three, organizations can securely share and analyze Salesforce data within Snowflake while maintaining identity governance through Salesforce IDP.
Why You Should Connect Salesforce Data Cloud to Snowflake Using Salesforce IDP
When you Connect Salesforce Data Cloud to Snowflake Using Salesforce IDP, your organization gains several operational and strategic advantages:
- Unified Data Management: Combine real-time Salesforce data with Snowflake’s analytics for deeper insights.
- Enhanced Security: Salesforce IDP ensures strong authentication and controlled access.
- Faster Decision-Making: Snowflake’s computing power helps visualize and analyze Salesforce data efficiently.
- Cost Efficiency: Reduces data duplication and manual processes by directly connecting platforms.
- Compliance Support: Ensure data privacy and regulatory compliance through secure identity protocols.
This integration allows enterprises to unlock the full potential of their Salesforce data ecosystem.
Step-by-Step Process to Connect Salesforce Data Cloud to Snowflake Using Salesforce IDP
Follow these steps to successfully Connect Salesforce Data Cloud to Snowflake Using Salesforce IDP:
Step 1: Configure Salesforce as an Identity Provider (IDP)
- Navigate to Setup > Identity Provider in Salesforce.
- Enable Salesforce as the IDP.
- Download the Salesforce IDP Metadata XML file.
Step 2: Set Up Snowflake as a Service Provider (SP)
- Log in to Snowflake Admin Console.
- Go to SAML Configuration and upload the Salesforce metadata file.
- Configure your ACS (Assertion Consumer Service) URL and Entity ID as per Salesforce settings.
Step 3: Establish Data Connection Between Salesforce Data Cloud and Snowflake
- Use Salesforce Connect or MuleSoft to link Salesforce Data Cloud datasets with Snowflake.
- Map Snowflake schema fields with Salesforce Data Cloud objects.
- Test the connection and data flow.
Step 4: Validate Authentication Using Salesforce IDP
- Attempt to log in to Snowflake through the Salesforce SSO portal.
- Verify that the authentication process redirects through Salesforce IDP.
- Confirm secure and consistent access for all authorized users.
By completing these steps, you can effectively Connect Salesforce Data Cloud to Snowflake Using Salesforce IDP with robust security and streamlined performance.
Best Practices for Maintaining the Integration
To ensure a smooth experience after you Connect Salesforce Data Cloud to Snowflake Using Salesforce IDP, follow these key practices:
- Regularly audit user access and IDP logs.
- Implement OAuth and SAML 2.0 for secure token management.
- Automate data sync schedules for continuous data freshness.
- Monitor Snowflake query performance to prevent latency.
- Keep both Salesforce and Snowflake environments updated.
Common Challenges and Solutions
While trying to Connect Salesforce Data Cloud to Snowflake Using Salesforce IDP, teams may face a few challenges:
Challenge | Solution |
Authentication errors | Recheck IDP metadata configuration and SAML assertions. |
Data mismatch | Validate mapping between Salesforce Data Cloud objects and Snowflake tables. |
Connection timeout | Optimize data queries and network settings. |
Each issue can be mitigated through consistent monitoring and testing during integration.
Benefits After You Connect Salesforce Data Cloud to Snowflake Using Salesforce IDP
Once you successfully Connect Salesforce Data Cloud to Snowflake Using Salesforce IDP, you’ll notice:
- Simplified access management through Salesforce credentials.
- Instant availability of Salesforce Data Cloud data for analytics in Snowflake.
- Reduced risk of unauthorized data exposure.
- Accelerated data-driven business insights.
This integration truly bridges the gap between Salesforce CRM intelligence and Snowflake’s analytical capabilities.
Conclusion
To summarize, when you Connect Salesforce Data Cloud to Snowflake Using Salesforce IDP, your enterprise achieves seamless, secure, and scalable data sharing. This approach not only enhances identity management but also boosts analytics performance and business intelligence outcomes.
For expert assistance in implementing or optimizing your Salesforce–Snowflake integration, connect with Tech i-vin Technology, your trusted Salesforce and data integration partner.
CTA:
🚀 Empower your business with integrated Salesforce and Snowflake solutions. Contact Tech i-vin Technology today to get started!